BySharon Peterson January 26, 2023
What foods DO require pressure canning? These directions are for pressure canning low-acid foods. This includes any meat and most vegetables, all of which must be pressure canned.
What foods DON’T require pressure canning? Pickles, jam jelly, or fruits are all high-acid foods. If you are preserving these foods, you need to be on my water bath canning page.
Tomatoes are a special case. Check out this page to learn more about when to use a pressure canner or a water bath canner.
Pressure Canning video Workshop
For those of you who are terrified of your pressure canner, go check out this pressure canning confidence workshop. 3 easy sessions, and you’ll have the canner off the shelf and practicing. Next step your friends will call you the “canning lady”. You could probably start today.
Just below, you’ll find detailed instruction on how to use your pressure canner. Each food will have different steps to preparing your food, filling jars, and processing time. To get started you’ll want to do two things….
- Check your specific food packing and processing time instructions. (There are links below if you need them.)
- Follow the instructions from this page for using your pressure canner. Refer back to this page if needed.
Pressure Canning Step-By-Step Directions for beginners
Gather all your pressure canning supplies:
- pressure canner
- canning jars
- canning lids and rings
- jar lifter and canning funnel
- towels and pot holders
- pots and bowls
- spoons, knives, etc.
- food to be canned
- other ingredients
Fill your canner with 3 quarts of water. Yes, that is all the water needed. Check the manual for your particular canner to verify the exact amount. Most need 3 quarts. The water will NOT cover the jars when the canner is full. That’s ok.
Remember, pressure is the key to safety in pressure canning. The pressure buildup is what causes the high heat necessary.
Set the rack on the bottom of the canner and heat water until hot, not boiling. Keep warm. The goal is that the canner and jars will be hot when your jars are being filled. So keep in mind your food preparation time.
Wash and rinse your jars and lids. Jars can be washed by hand or in the dishwasher. You don’t need to sterilize jars in pressure canning. The high temperatures reached in the canner will sterilize everything. You DO need to start with clean jars.
Keep the jars hot until use. My favorite way to do this is to just place the clean jars in the hot water in the canner. I’ve got some other options too that I go over just below.
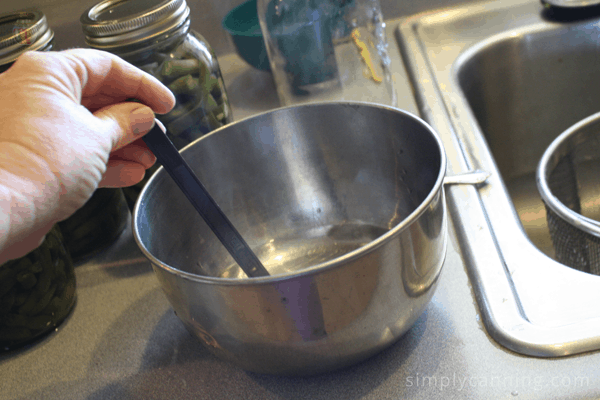
The lids also need to be clean but do not need to be boiled or sterilized. My suggestion is to put them in a bowl of warm water ready to pull out with your lid lifter. This will give you a good rinse, but no boiling needed.
How to keep canning jars hot.
For keeping jars hot, I have three options for you.
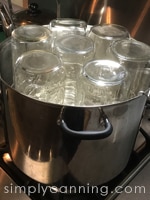
- Place the clean jars upside down in a large pot with 2 or 3 inches of hot water. Bring to a boil and turn off the heat. Leave the jars in the water until ready to be filled.
- You can also wash the jars in the dishwasher and then simply leave them there until ready to fill. Keeping the door to the dishwasher closed keeps in the steam and heat. Remove the jars a couple at a time as needed.
- This third way is my preferred method. Place your jars right in your canner. The water should be warming anyway as you prep your food. With your jars in the canner, they will get heated up at the same time. I put mine upside down, sometimes they tend to tip a little as the water heats up. The water and heat is affecting the air in the jar. (It’ll make more sense when you do it. Not a big deal) I just work with it and tip them back up as needed.
Prepare & Pack Food
This is where you need to check the specific directions for your food. There will be lots of detailed instruction. Pay attention to the following.
- How the food is prepared before you pack your jars. For example, hot pack or raw pack, headspace… there may be other things. Just follow directions.
- Processing time. This will vary according to the type of food, the jar size, and if it is hot packed or raw packed.
- Altitude adjustments. You need to adjust the time according to your elevation where you live. This adjustment should be included with your recipe. Remember, Water boils at different temperatures depending on the altitude, this of course affects the processing time. More details on that can be found here… Altitude Adjustments
Here are some links to lists of food specific pressure canning recipes – Canning Vegetables and Canning Meat. These are all processed in a pressure canner. Then come back here to operate your canner.
Filling your Canning Jars
Fill jar, leaving the recommended headspace. Remove air bubbles by running a non-metallic spatula around the inside of the jar. I like to use a plastic orange peeler for this step. It is small and easily slides down. A small rubber spatula will also work.
Wipe the rim off the jar clean with a damp tea towel or paper towel.
Place seals and rings on jars. Tighten finger tight. You really don’t have to crank down hard. Snug is fine. I’ve been asked just what does finger tight mean? It is hard to describe so… I did a video. Check here if you wonder what is finger tight?
Pressure Canning Process
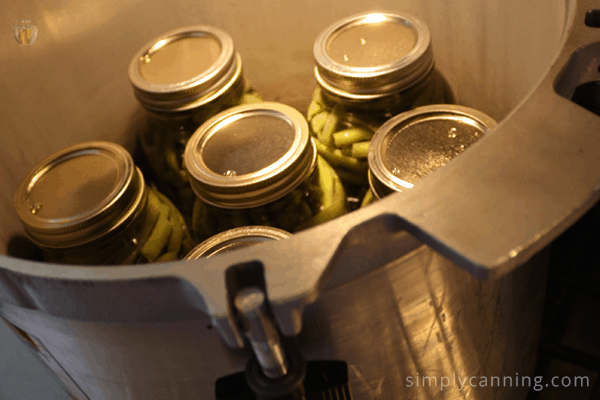
Place your filled jars on the rack in the pressure canner.
- The jars must not sit directly on the bottom of the canner you need to have a rack.
- Try to be sure jars are not touching each other. Steam needs to flow freely around each jar. Sometimes this takes a little maneuvering, twisting the jars so that the flatter sides leave more room. My older canner is a little narrower that my newer one.
Place the canner lid securely on the canner. And be sure the cover locks down. Heat to boiling. Do not place the weights on yet. At this point, steam should be escaping from the vent. This is called venting.
Venting the Pressure Canner
Allow the steam to vent for 10 minutes. Venting means letting steam and air escape from the canner, which is a crucial step—don’t skip it.
As pressure builds inside the canner, the water heats up and turns into steam. This steam forces out any remaining air. Once the vent is closed, the canner traps and pressurizes the steam. Because steam under pressure reaches higher temperatures than boiling water, your jars don’t need to be submerged—the steam does all the heating.
This high heat (240°F) is what makes canning vegetables and meat safe.
After the 10 minutes venting, put your weight on the canner and let the pressure build.
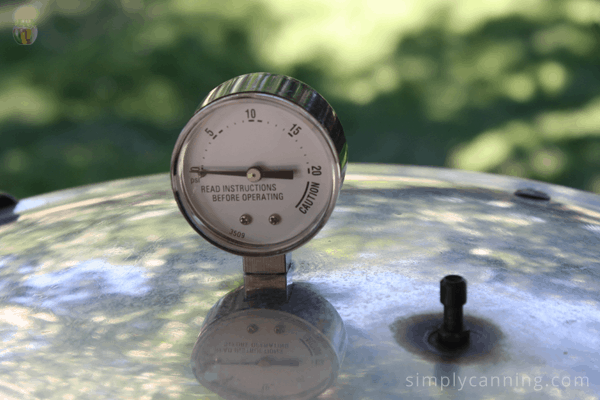
Weighted Gauge or Dial Gauge
If you’re using a dial gauge canner, you’ll monitor the dial to see when it reaches the correct pressure. The weight on these canners serves only as a counterweight to seal the vent and allow pressure to build. Watch the dial and turn your heat up or down to regulate your pressure.
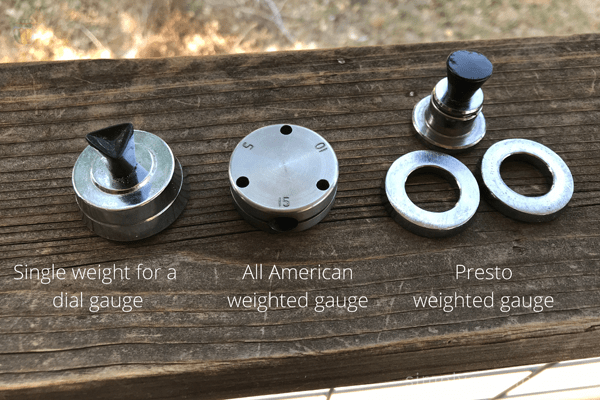
If you’re using a weighted gauge canner, you’ll determine when it reaches pressure by watching or listening to the weights. Be sure to use the correct weight for your altitude. The All American canner has separate holes in the weight for different pressure levels, while the Presto canner uses rings to adjust the weight. Once the canner reaches the correct pressure, the weight will rock and release steam, maintaining the proper pressure level. Turn your heat up or down as needed to maintain the rocking or spinning of your weights.
Adjust heat as needed to keep it at the correct gauge pressure. It is best to keep the pressure as steady as possible. A lot of fluctuation can cause liquid loss. This is where you have to learn your stove. It will get easier to maintain pressure as you get to know your stove and how it reacts as you adjust. Sometimes it is very small adjustments!
NOW Start Timing…
Time needed for your food will be given in the recipe. Again, be sure to adjust for altitude.
Check your gauge often. In pressure canning, you must maintain the correct pressure. If the pressure drops below the recommended level, start your time over. ~ Bummer ~ I hate it when that happens! Yes, I’ve done it.
The best way to avoid this mistake is to make it a point to stay in the kitchen and do other stuff, checking the dial gauge occasionally. If you’ve got a weighted gauge you can listen to the rock and you’ll notice if it changes up or down.
You can be cleaning up or getting your next load ready. Take a break! You deserve it. Have a cup of coffee or tea or ice cold water! Put your feet up. But stay near the canner so you can keep an eye on it.
When time is up, turn off the heat. Do not remove weights. Let the canner rest and cool naturally until pressure comes back to zero.
After Processing; Cooling down and removing Jars
NOW is the time you can leave the kitchen. DO NOT try to speed up the cooling process by pouring cold water over the canner or using some other artificial method. NO fans, no cool cloths. Just let the canner cool and release pressure all by itself.
When the pressure in the canner is at zero, pressure is released, so you may now remove the weight. Then wait about 2- 5 minutes.
I’ll then open the lid but set it loosely on top of the canner and wait another 2- 5 minutes or so. You want the jars to gradually cool down. If you go super fast you might have some liquid loss.
And finally, fully remove the lid. Be careful! CONTENTS ARE STILL HOT AND STEAMY. Tilt the lid so the steam will not hit you in the face. If my jars are still boiling (very common) I’ll wait another 2-5 minutes. Then you want to remove the jars from the canner.
The jars may still be boiling even at this point. But it’s ok. You want this to be gradual so you avoid liquid loss. But you do NOT want to make this a long process. Don’t extend the time in the canner much longer than this.
I’ve read people who allow jars to cool completely in the canner or overnight. I don’t recommend that. You will be keeping the jars hot longer than needed and you’ll risk something called Flat Sour. Flat Sour is not dangerous but it makes your food taste terrible and sour.
Using a jar lifter, carefully remove the jars (again, no tilting) and set upright on a wooden board or a thick towel to cool. Be sure they are in a draft-free area and leave 1-2 inches of space between each jar so air can circulate.
My favorite part… Canning Lid Ping!
Listen…
Did you hear it? This is my favorite part of pressure canning (and water bath canning). As the jars cool, the seals (or flats) will pull down and seal. They make the coolest little pinging sound. For some odd reason, I love that sound. It is so satisfying. It means all my work is…well…working!
Just FYI, they won’t always ping. Sometimes you’ll miss it or the jars may just decide not to make a sound. It doesn’t always mean a seal failure. Learn more about what missing that ping means.
Resist the temptation to press the lids. If your kids are like mine, keep them away too! Just leave the jars alone until completely cool.
How Long Does It Take Canning Jars to Seal?
This may take 12-24 hours. I leave mine on the counter overnight. I love waking up in the morning to the jars sitting out on the counter with the morning sun shining off of them!

After Jars are Cool, You May Press on the Lid to Check the Seal
The seal should be sucked down and not pop up. Another way to check the seal is to remove the screw cap and lift the jar by the lid. If you find a jar that did not seal, simply put the jar in the fridge and plan on using the food within a few days.
Wash the jar. The outsides will often be sticky. Sometimes a quick rinse is all that is needed, sometimes a bit of soapy water is in order.
It is a good idea (but not essential) to store without the screw cap. I highly recommend removing the bands. Sometimes the band can keep the lid on the jar even if the seal has broken. Personally I want to know if the seal has broken… I don’t want that screw band holding the lid in place. If the seal breaks, the food spoils.
For those that choose to leave the screw band on you still need to remove it to wash your jar and band. Then make sure it is completely dry and put back on your jar loosely. The bands will rust if there is any moisture remaining.
(I’m going to say it again… just leave the screw bands off. It is better.)
Label Food Type & Date
You may think that labeling the type of food isn’t necessary if you can obviously see what is in the jar. But sometimes you will use a different recipe. Soup for example. Or a type of green bean. You will want to know which is which when you open them later. You can then decide which you like better for next time.
More importantly is remembering when you processed the jars.
Always record the date, at least the year. That way, when you find a jar in the waaaay back of your cupboard, you will know how old it is. You think you will keep them straight, but it is so easy to forget and so easy to label them now. Trust me. Just do it.
Store the jars in a cool, dark, dry environment. Usually a pantry is fine. Don’t store in a utility room where there are hot pipes or high humidity. Direct sunlight is a no-no as well.
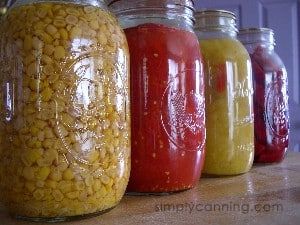
You’re Done!
Now stand back and admire all colorful jars full of delicious, nutritious foods. Admire your work! Wasn’t that easy??? Pressure canning is not as difficult as it may seem. What? You’re tired? Yes, but it is a satisfying tired, is it not?
How to Use a Pressure Canner
Pressure canning is for canning vegetables and meats. Don’t let it intimidate you! You can do this.
Equipment
Materials
- Low-acid food meat or vegetables (any low-acid food that you want to process)
Instructions
Before You Start
- Find a tested recipe for your food (type of food, jar size, and pack method).Familiarize yourself with the recipe’s prep steps (peeling, blanching, pre-cooking for hot pack, acid additions if called for). The recipe should also tell you headspace and whether to use raw pack or hot pack. It should also include altitude adjustments.
Gather all Equipment and Supplies
- Place the appropriate amount of water in the canner. Usually about 3 quarts or 2-3 inches of water. Check your canner manual for exact measurements. Be sure you have the rack in the canner.Start heating it up. The goal is for the canner to be hot but not boiling as you are filling your jars.
- Wash and rinse your jars and lids. (They do not need to be sterilized.)
- Keep your jars hot until ready to be filled. The easiest way is to place them upside down in the canner while it heats up. But you can also leave them in a hot steamy dishwasher.
Canning Process
- Prepare your food according to the directions for that food. This may vary by food type. Follow directions for cut size, blanching or not, pre-cook if needed, raw pack or hot pack, ingredients, acidification etc.
- Fill a jar following the recipe. Jar size matters. Pack method matters. (raw pack or hot pack) Leave the appropriate headspace. (the space between the food and the lid.)
- Remove air bubbles if needed. Adjust headspace again if needed.
- Wipe rims of your jar clean, then place on the lid and screw band.
- Place the filled jar upright into the canner. Continue until all jars are filled.
- Put your lid on the canner, leaving the weights off. Raise your heat and bring to a boil. Watch for the steam to start coming out the vent pipe in the lid.
- Allow the steam to ‘vent’ for 10 minutes.
- Put the weights on. This is when pressure will start to build.
- When the pressure reaches the proper level for your altitude, start your processing time at that point.Use the correct processing time and weights according to your jars size, pack style, and altitude. This should be included in your recipe.Adjust the heat as necessary to keep the canner at the proper pressure throughout the processing time. A little high is ok… if you drop below your pressure start your time over.For weighted gauges pressure is reached when the weight begins rocking; for dial gauges this is when the needle reads and stays at the target pressure.
- When processing time is completed, turn off the heat. Do not remove weights. Let the canner sit undisturbed until pressure comes back to zero. It will still be very hot!
Cool Down and Storage
- Remove the weight and wait 5 minutes. This allows for gradual cool down.Open the lid to allow steam to escape. (Carefully, don’t let it hit your face or arms!) Wait 5 minutes.Take the lid off the canner and remove your jars. Jars may still be bubbling. This is normal. It should not be a hard boil. (Optionally, you can wait another 5-10 minutes if the contents appear to be bubbling hard.)
- Put the jars on a counter with a thick towel beneath them to protect the hot jar from the cool counter. Allow them to cool to room temperature undisturbed. 12 hours is suggested. Do not try to speed up the cooling process!
- When they are cool, remove the metal bands, check the seals. Lids should be concave and not flex. Another way to check seals is to remove the bands lift the lid with your fingers.Remove the bands and wash jars if needed.
- Label and store your foods in a cool dark place. I suggest storing without rings. If you want to leave the rings screw them on loosely.
Credit: Simply Canning
https://www.simplycanning.com/pressure-canning/
